In the run up to releasing my most recent book, THE PRINCE’S HEIR, I set out to format my first paperback for a long time, and decided to document the stages so I will have a post to refer to next time, and not have to figure it out all over again!
Hopefully this will also be of some use to those of you who haven’t yet created paperbacks to go alongside your eBooks.
And yes, I do think they are worth it. I don’t sell a whole heap of physical books, but I certainly do sell some, and every sale is worth having. When the book is already written, and the cover designed, with just a small extra cost (if you buy your covers, like I do) to turn the cover into a wrap around, why not?
Step #1 – prepare the manuscript
So, starting with the raw manuscript my first step is to change it from double spacing (I’m used to writing with double spacing for my trad published books, and find it easier to spot mistakes in my indie work by following the same format), to single spaced.
I am working in MS Word, so forgive me if the images are different from yours, but the sequence should still be the same.
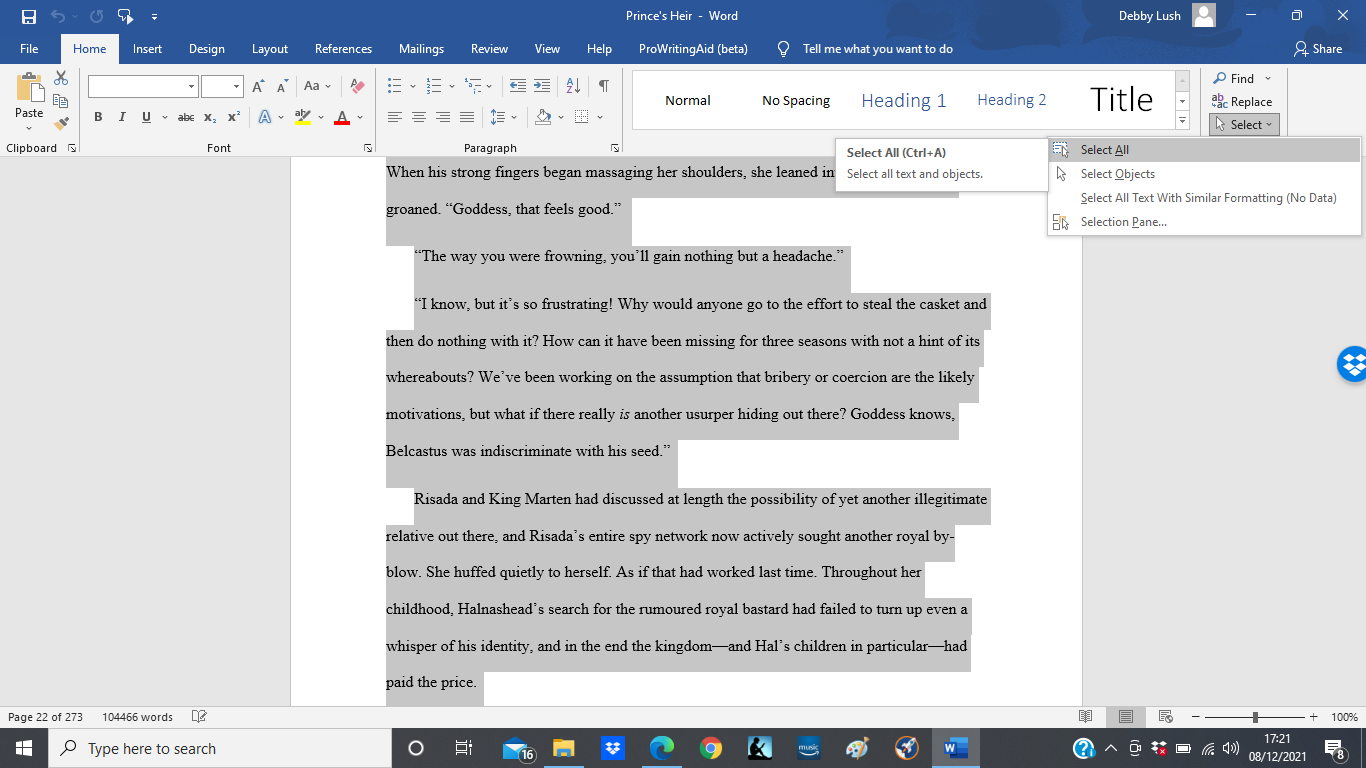

This puts all my chapter headings out of place, so next I go through and re-centre all headings, and at the same time, drop them down the page to where I want them in the paperback version, which is lower down the page than for the eBook. I leave 5 x point 12 (Times New Roman, which is the font I’m using) from the top of the page to the title, title is point 14, and then 2 x point 12 to the first line, which is always hard to the edge, with no indent.

For subsequent lines, I go through and cut the tab down to point 2. I use point 3 for the eBook, which creates more white space, which is a good thing for reading on a screen. However, it can cause unnecessary extra lines in the paperback, and I want as far as possible to keep the text as compact as I can in order to keep the page count down (more pages = higher cost). It’s surprising how many lines you can lose just by minimising your tab size.

Step #2 – download a template
Now your manuscript is ready for you to start formatting your paperback.
If you’ve looked at KDP, clicked on ‘Format your Paperback’, and panicked – wait! Take a deep breath! There is FAR too much unnecessarily complicated information on stuff like trim sizes and margins. You don’t need to know this! All you need to do is to find this page on KDP (hint: use the keyword ‘template’ in the search box)

Click on Templates, and download the folder. I just download the blank templates and start using them, but if you want examples of how it should look, then download the ones with sample content. You will get a Zip file containing a huge range of templates of different sizes. At this point, you need to decide what size you want your paperback to be. I use 5.5 x 8.5 inches for mine, which are in the 105K – 125K word size, but it’s entirely up to you – you only need to open one template for the size you’ve chosen.
Don’t forget to match this the size to your cover.
When you open a blank template, it will look like this:

You need to click on ‘Enable Editing’, and then delete the placeholder text at the top of the page.
And now you are ready to start transferring your text!
Step #3 – numbering
Word of caution, you are NOT yet done with formatting, so keep reading…
I tend to move one chapter at a time. That might be a bit long winded, but I find I don’t create mistakes that way. So, copy the first bit of text you want to add – probably the title page and copyright page – and paste them into the template. It will now look like this:

Note: although this looks like the title page is on the left, bear in mind that this is just the template view – page 1 (title page) will be the first page inside the paperback, so on the RIGHTHAND side in the finished article.
Next, transfer your first chapter in the same manner.
And now we can get down to the next bit of formatting.
I don’t want page numbering on my title page, copyright page, and maps/family tree, all of which precede the Prologue. So, to do this, first create 2 different sections. Put the cursor at the top of the start of section 2 (on the Prologue page, in my case, above the first word). Then click on Page Layout, then on Breaks, and on the drop down menu, Next Page.

Everything before the prologue is now Section 1, while everything from the prologue onward is Section 2.
To start numbering from the beginning of Section 2, I double click on the footer area of the first page of Section 2 to bring up Header and Footer options. Alternatively, with the cursor on the first page of Section 2, click on Insert, then Page Number, then decide where you want the number to appear – I put it bottom of the page in the centre.
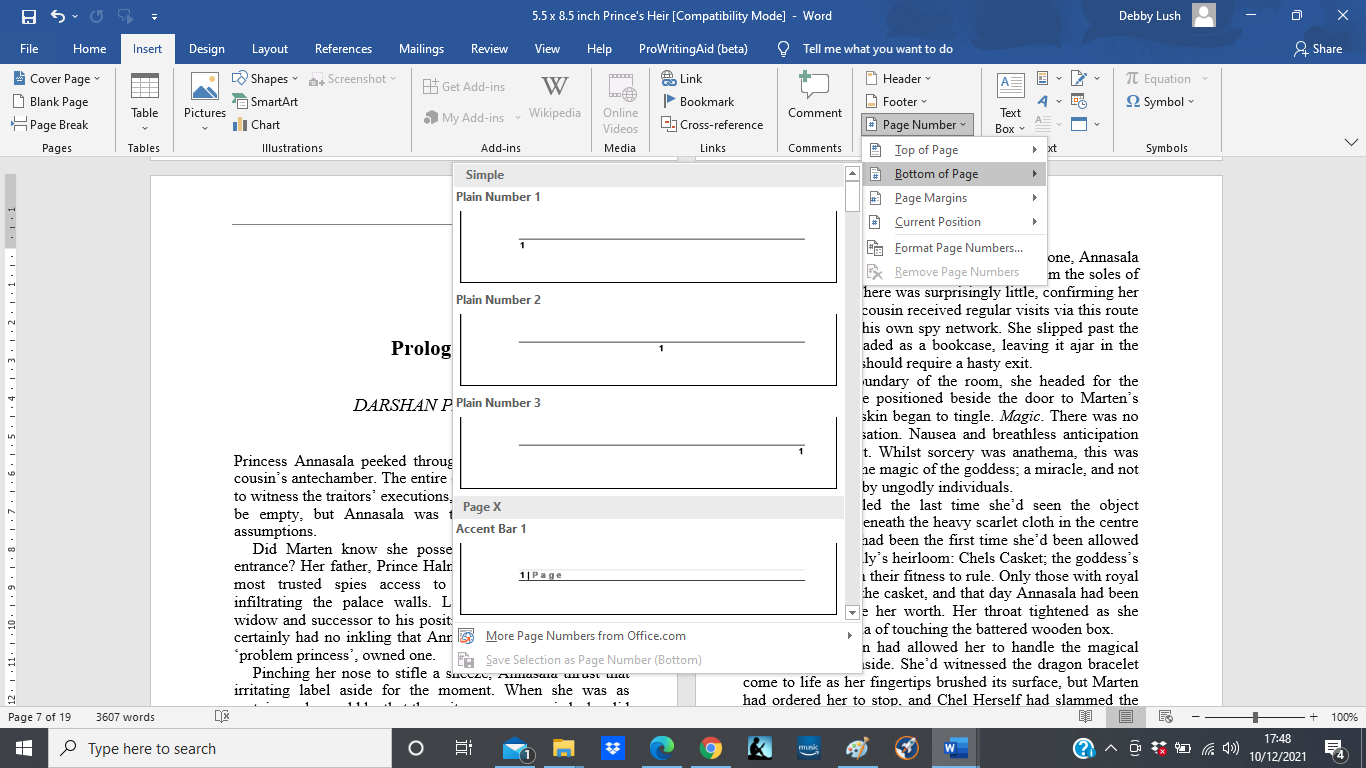
Next, I click on ‘Format Page Numbers’

Ensure ‘Continue from previous section is UNCHECKED, and click on ‘Start at’ and put in 1. Now your numbering starts from page 1 of your story, and not from the title page.
You should also ensure ‘Link to Previous’ is unchecked.

If you have an intro, or something a bit longer in Section 1, and you want to number that also, you can use something different, such as Roman Numerals, and follow the same procedure as above for that section.
Step #4 – headers
Now I also like to have the headers different on odd and even pages – the book title on odd pages, and my author name on even pages, with nothing in the header on page 1.


If in trouble, check out this video to see how to unlink the sections: https://www.bing.com/videos/riverview/relatedvideo?q=getting+different+headers+in+section+1+and+2+in+WOrd+document&mid=A198012488D38B7D1F47A198012488D38B7D1F47&FORM=VIRE
If this results in your page numbers only appearing on either odd or even pages, then take this further step:

Now CLOSE header and footer.
Step #5 – Widows and Orphans
Next, you want to deal with widows and orphans. No, I’m not referring to any special charity cases – in typographical terminology a widow is the last line of a paragraph left by itself at the top of a page, and an orphan is the first line of a paragraph left by itself at the bottom of a page. Unless you switch the appropriate control off , Word will automatically move text so this doesn’t happen. Unfortunately in the case of a book, you don’t want to have the blank spaces at the bottom of a page which are the result. Aside from looking odd (and unprofessional) every extra space you leave adds to the number of pages of your book, which raises the printing price.

You need to find your ‘widows and orphans’ control, which will depend on which version of Word you are using – I had to root around on YouTube tutorials to find mine.
Step #6 – clean up and check
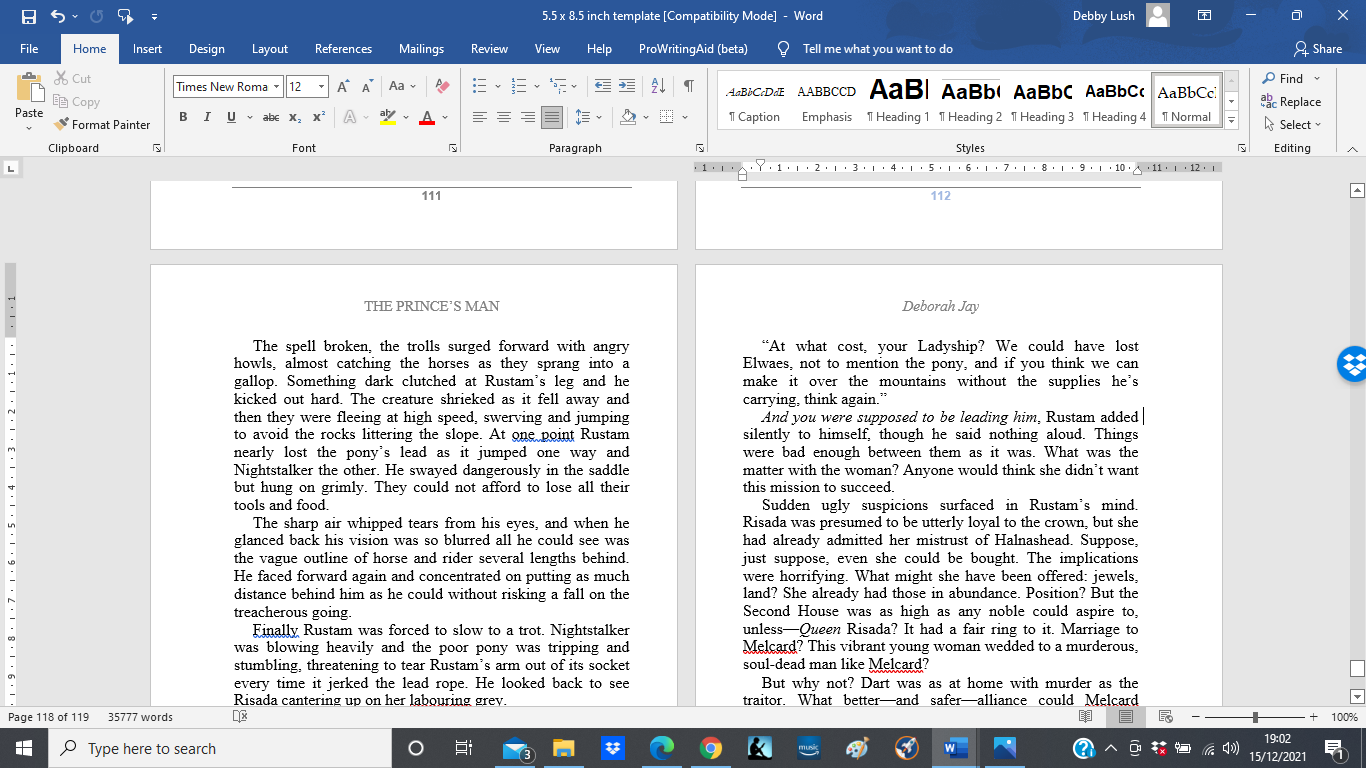
Of course, just to be contrary, not all of the initial formatting carried over – notably many of the indents vanished, and a few of the chapter headings were at random heights from the top of the page. I had to go through and make manual corrections, so please don’t make any assumptions, and always check each and every page for these sort of inconsistencies.
Once you have the template looking how you want it, save as a PDF.
Step #7 – upload to KDP
Et voila! You are now ready to upload your PDF directly to your paperback page on KDP. No need to format your own template with the required margins etc., just cut and paste to one they so handily provide.
Have you struggled with formatting your own paperbacks? Have you missed a step or two along the way to producing a professional-looking product? Or do you pay someone else to do this step for you?
At least I can now look back and re-read this when I want to format my next one!


This is brilliant. Saving and sharing. I am always trying to speed things up, but occasionally find I end up with odd formatting that takes forever to clean out (forever defined as I have to remove all formatting–resave as a TXT doc–and reformat from the beginning). If I’d done it right the first time–like this–it would have been faster!
LikeLiked by 1 person
I love doing this sort of post – it’s a great way for me to write my own reminder and share with others too 😀
I learned long ago how to format the basic Word doc so I don’t have to strip out the formatting or save as a TXT doc, but even so anomalies sometimes sneak in!
LikeLiked by 1 person
I never did figure out what caused the problem, which was why I had to save as a TXT. Did you identify anything in particular?
LikeLiked by 1 person
Nope. Computer programmes seem to do random, inexplicable things at times, despite there should be logic to them!
LikeLiked by 1 person
It is well over two years since I last published on Amazon so I am going to be like a beginner, thanks for doing this.
LikeLiked by 1 person
You are welcome. I’m fed up with having to learn it all over again each time as there’s always a long gap for me between publishing new books, so even though I might change up to a newer version of Word soon, at least I will remember what steps I need to take!
LikeLike
Good stuff! 😀 … I often forget to do the ‘widders’-n-orphans step. 😀
LikeLiked by 1 person
Lol, with a name like that, how could you forget??? ;D
LikeLiked by 1 person
Heh, heh, heh 😀 I know s’embaressing ‘s’wot it is! 😀
LikeLiked by 1 person
😂😂😂
LikeLiked by 1 person
Debby, thank you. Your post is a treasure, as I need this information and your shared wisdom. You have saved me hours. ❤
LikeLiked by 1 person
Pleased I could help Jane. I hope it goes smoothly for you, although it never has done for me yet!
LikeLiked by 1 person
Deb, this is fantastic. You are a rockstar! I’ll be sharing this in my Writer’s Tips upon my return. ❤
LikeLiked by 1 person
Very happy to share, Deb. I’m always surprised when I remember how much formatting there is to do to get a paperback ready, so I thought a handy reminder post was in order!
LikeLiked by 1 person
I know many will appreciate it 🙂 x
LikeLiked by 1 person
[…] https://deborahjayauthor.com/2022/03/14/7-steps-to-formatting-your-paperback-book-indieauthor-kdp/co… […]
LikeLike
Great tutorial, Deborah. It took me a long time to learn this, and I think I finally have it down. Your post would have saved me a lot of time years ago! Thanks for sharing your expertise. 🙂
LikeLiked by 1 person
It would have saved me a lot of time if I’d written it years ago, when I did my first. Then I wouldn’t have needed to find it all out again each time I wanted to publish a new one!
LikeLiked by 1 person
LOL. That happens to me too! (Now, how did I do that?)
LikeLiked by 1 person
[…] the paperback interior. I spent hours cutting and pasting into the new Amazon KDP print template (see my earlier post on how to format a paperback), finally wrestled it into shape – and then noticed the number of pages was significantly […]
LikeLike
Reblogged this on Kim's Musings.
LikeLiked by 1 person
Thank you so much!! This handy reference is very helpful. I will utilize this today. Currently working with a template but did some steps out of order which has caused tremendous frustration! I will use the blank template instead of the prefilled one. I thought only other languages could use it as stated on KDP. Thanks much 🙏
LikeLiked by 1 person
I frequently find Amazon frustrating! I hope you are able to get your paperback in order – I’ve done it lots of times now, but the details of the process never seems to be the same twice in a row.
LikeLike
Thank you so much! What about the margins if you’re using their 6 by 9 template without bleed. Do I adjust page setup 6.12 x 9.25 to accommodate the trim? No worries if you don’t have the answer I know this is specific to my project! Just thought I’d ask like you said there’s always something new on KDP!
LikeLike
I have no idea! I just copy and paste into the template exactly as it is and it comes out just fine.
LikeLike
Ok, I guess I’m doing to much lol!
I did get a proof copy back and wanted to tweak a few things but forgot some of the things I had done previously that’s why your post was timely! Can’t wait to work on it later today! 🙏
LikeLiked by 1 person
Thanks again for the formatting tips, my book is shaping up!
LikeLiked by 1 person
Excellent! And good luck.
LikeLike